I. Introduction
A. Explanation of the purpose of the article
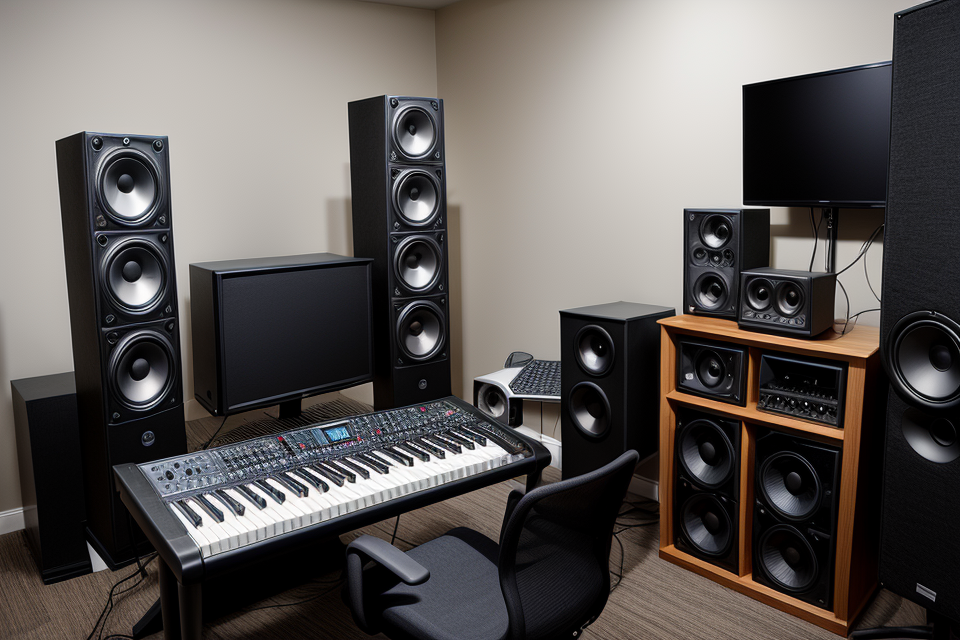
B. Overview of the key components of a home studio
II. Space and Acoustics
A. Finding the right space for your home studio
B. Tips for optimizing acoustics in your studio
C. The importance of soundproofing your studio
III. Equipment and Software
A. Essential equipment for a home studio
B. Recommended software for music production
C. Choosing the right instruments and hardware for your needs
IV. Setting Up Your Workspace
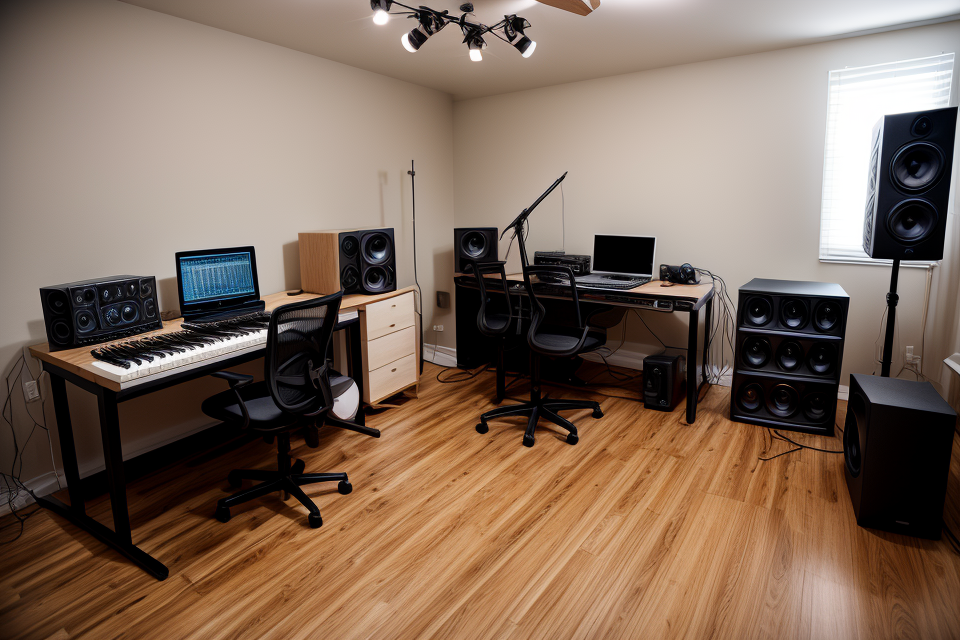
A. Creating a comfortable and functional workspace
B. Organizing your equipment and software
C. Customizing your studio to fit your workflow
V. Recording and Production Techniques
A. Tips for recording high-quality audio
B. Best practices for mixing and mastering your tracks
C. Common mistakes to avoid in the recording process
VI. Conclusion
A. Summary of key takeaways
B. Encouragement to start setting up your own home studio
C. Additional resources for further learning
Setting up a home studio can be an exciting yet daunting task for aspiring musicians, producers, and audio enthusiasts. It requires careful consideration of various factors such as space, equipment, and budget. However, with the right approach and guidance, you can create a professional-grade home studio that enables you to produce high-quality audio recordings. In this comprehensive guide, we will cover everything you need to know about setting up your home studio, from selecting the right equipment to optimizing your acoustic environment. So, let’s get started and make your dream of having a home studio a reality!
Space and Acoustics
Finding the right space for your home studio
When it comes to setting up a home studio, one of the most important factors to consider is the space itself. Finding the right space for your home studio can be crucial in ensuring that you have the right environment for creating and recording music. Here are some tips to help you find the right space for your home studio:
- Consider the size: The size of the room will play a big role in determining the acoustics of the space. A small room can make it difficult to achieve a good sound, while a large room can lead to sound-reflection issues. It’s important to find a balance between the two. A room that is too small may result in a boxy, unnatural sound, while a room that is too large may lead to a muddy, indistinct sound. A good rule of thumb is to aim for a room that is at least 10×12 feet, but no larger than 20×20 feet.
- Location, location, location: The location of the room is also important. Ideally, you want to locate your home studio in a quiet area of your home, away from any sources of noise or vibration. This could be a spare bedroom, a closet, or even a basement. It’s also important to consider the location of windows and other reflective surfaces, as these can affect the acoustics of the room.
- Invest in acoustic treatment: Even if you find the perfect space, it’s likely that you’ll still need to invest in some acoustic treatment to achieve the ideal sound. This could include soundproofing the room, adding acoustic panels to the walls and ceiling, or even building a sound booth within the room.
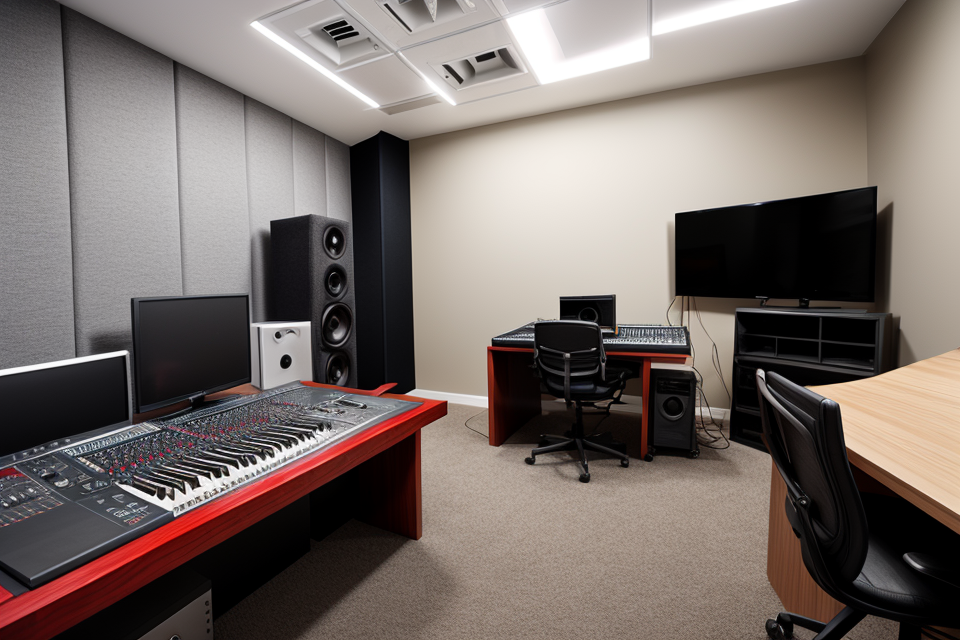
- Consider the layout: The layout of the room can also play a role in the acoustics. Ideally, you want to arrange the furniture and equipment in a way that minimizes reflections and maximizes sound quality. This may involve placing the speakers in specific locations, or using sound-absorbing materials to minimize echo and reverberation.
By following these tips, you can find the right space for your home studio and create an environment that is conducive to creating and recording high-quality music.
Tips for optimizing acoustics in your studio
- Positioning of equipment: Ensure that your equipment is placed against walls, corners or other solid surfaces, as this will help to minimize reflections and reverberation.
- Reflection and diffusion materials: Consider using reflection and diffusion materials such as bass traps, diffusers, or absorption panels to help control sound reflections and create a more balanced and natural sound in your studio.
- Studio layout: Arrange your studio in a way that minimizes the distance between your recording area and your listening area. This will help to reduce the time delay between recording and monitoring, and will make it easier to hear your tracks as they will be played back in real-time.
- Ceiling treatment: If your studio has a high ceiling, consider adding some form of ceiling treatment, such as a cloud or bass trap, to help control reflections and improve the overall acoustics of your studio.
- Noise isolation: If you’re in a noisy environment, consider adding some form of noise isolation, such as acoustic panels or soundproofing materials, to help minimize outside noise and create a more conducive recording environment.
- Monitor placement: Position your monitors in a way that minimizes reflections off of nearby surfaces, such as walls or ceilings. Also, make sure that your monitors are angled slightly towards you, and that you are sitting at a comfortable distance from them.
- Furniture and decor: Keep your studio free of unnecessary furniture and decor, as these can reflect sound and interfere with the overall acoustics of your studio. Instead, opt for simple and neutral decor that won’t interfere with your recording environment.
The importance of soundproofing your studio
Creating a home studio requires careful consideration of various factors, including the acoustics of the space. Soundproofing your studio is a crucial aspect of setting up a home recording environment. In this section, we will discuss the importance of soundproofing your studio and the benefits it provides.
- Improved Sound Quality
Soundproofing your studio helps to eliminate external noise and reflections that can negatively impact the sound quality of your recordings. By reducing the amount of noise that enters your studio, you can achieve a cleaner and more professional-sounding recording. This is particularly important when recording vocals, as even small amounts of external noise can be amplified and become noticeable in the final recording.
- Control over Ambient Noise
Soundproofing your studio also allows you to have greater control over ambient noise. When a space is not properly soundproofed, external noise can seep in and disrupt your recording. This can be particularly problematic when recording drums, as the loud and distinctive sounds of drumming can easily bleed into adjacent rooms. By soundproofing your studio, you can reduce the amount of ambient noise that enters your recordings, giving you greater control over the final sound.
- Flexibility in Recording
Finally, soundproofing your studio provides you with greater flexibility in your recording. When a space is not properly soundproofed, you may be limited in the types of recordings you can create. For example, if your studio is not soundproofed, you may be unable to record loud instruments like electric guitars or basses without causing disruption to other parts of your home. By soundproofing your studio, you can record a wider range of instruments and sounds, giving you greater flexibility in your recording.
In conclusion, soundproofing your studio is an essential aspect of setting up a home recording environment. By improving sound quality, controlling ambient noise, and providing greater flexibility in recording, soundproofing your studio can help you achieve professional-sounding recordings in the comfort of your own home.
Equipment and Software
Essential equipment for a home studio
Having the right equipment is crucial when setting up a home studio. Here are some essential pieces of equipment that you will need:
- Microphone: A good quality microphone is essential for recording high-quality audio. There are many types of microphones available, including condenser microphones, dynamic microphones, and USB microphones.
- Audio interface: An audio interface is used to connect your microphone and other audio equipment to your computer. It converts analog audio signals into digital signals that can be recorded or processed using software.
- Headphones: A good pair of headphones is necessary for monitoring your audio recordings. Over-ear headphones are a popular choice for home studios as they provide better sound quality and isolation.
- Pop filter: A pop filter is used to reduce popping sounds that can occur when recording vocals. It helps to prevent plosive sounds from being picked up by the microphone.
- Acoustic treatment: Good acoustics are crucial for a home studio. You may need to invest in acoustic panels, bass traps, or diffusers to control room reflections and create a more neutral sound environment.
Having the right equipment is just the first step in setting up a home studio. You also need to ensure that the equipment is set up correctly and calibrated for optimal performance. This may involve adjusting settings in your software or using specialized equipment like calibration microphones. With the right equipment and proper setup, you can create high-quality audio recordings from the comfort of your own home.
Recommended software for music production
When it comes to setting up a home studio for music production, there are a variety of software options available. Each of these options has its own unique features and capabilities, making it important to choose the right one for your needs.
Some of the most popular software options for music production include:
- Ableton Live: This software is known for its versatility and is a great option for producers who want to create music in a variety of genres. It has a user-friendly interface and is great for live performances as well as recording and producing music.
- Logic Pro: This software is a favorite among professional producers and is known for its powerful audio editing capabilities. It is also a great option for those who want to work with virtual instruments and MIDI controllers.
- FL Studio: This software is known for its advanced editing capabilities and is a great option for producers who want to create complex arrangements and tracks. It is also great for working with virtual instruments and samples.
- Pro Tools: This software is a favorite among professional producers and is known for its high-quality audio recording capabilities. It is also a great option for those who want to work with a variety of plugins and virtual instruments.
Ultimately, the best software for your home studio will depend on your personal preferences and the type of music you want to produce. It’s a good idea to try out a few different options and see which one works best for you.
Choosing the right instruments and hardware for your needs
When setting up your home studio, it is crucial to choose the right instruments and hardware that suit your needs. Here are some factors to consider when making your selection:
Your Musical Genre
The instruments and hardware you choose should be suitable for the music genre you want to record. For example, if you want to record rock music, you may need electric guitars, drums, and a bass guitar. On the other hand, if you want to record classical music, you may need acoustic guitars, violins, and cellos.
Your Budget
Your budget is another important factor to consider when choosing instruments and hardware. You don’t have to break the bank to set up a home studio. You can start with a basic setup and add more equipment as you go along. However, it is essential to ensure that the equipment you choose is of good quality and will meet your needs.
Your Skill Level
Your skill level is also an important consideration when choosing instruments and hardware. If you are a beginner, you may want to start with simpler instruments and equipment that are easy to use. As you gain more experience, you can upgrade to more complex equipment.
Compatibility with Software
It is also important to consider the compatibility of your instruments and hardware with the software you plan to use. For example, if you plan to use digital audio workstation (DAW) software, you may need instruments and hardware that are compatible with the software.
In summary, when choosing instruments and hardware for your home studio, consider your musical genre, budget, skill level, and compatibility with software. By doing so, you can ensure that you have the right equipment to meet your needs and produce high-quality recordings.
Setting Up Your Workspace
Creating a comfortable and functional workspace
Creating a comfortable and functional workspace is essential for setting up your home studio. Here are some tips to help you achieve this:
Ergonomics
Ergonomics refers to the study of designing equipment and devices that fit the human body. When setting up your home studio, you should consider ergonomics to ensure that your workspace is comfortable and safe.
Here are some ergonomic principles to keep in mind:
- Adjust your chair height so that your feet are flat on the floor, and your knees are at a 90-degree angle.
- Position your computer monitor at eye level to avoid straining your neck and eyes.
- Place your keyboard and mouse close to your body to avoid reaching forward and twisting your wrists.
- Use a drafting table or standing desk if you plan to work for extended periods.
Lighting
Proper lighting is crucial for setting up your home studio. You should ensure that your workspace is well-lit but not too bright to avoid glare and eye strain.
Here are some lighting tips:
- Position your workspace near a window to take advantage of natural light.
- Use overhead lighting to provide general illumination.
- Use task lighting to focus on specific areas, such as your desk or workspace.
- Use a desk lamp or table lamp to provide additional lighting if needed.
Acoustics
Acoustics is also an essential factor to consider when setting up your home studio. You should ensure that your workspace is free from distracting noises and echoes.
Here are some acoustic tips:
- Use carpets, curtains, or rugs to absorb sound.
- Use soundproofing materials, such as acoustic panels or foam, to reduce echoes and reverberation.
- Place your workspace away from high-traffic areas, such as hallways or kitchens, to minimize noise.
- Use headphones or earbuds to listen to music or audio without disturbing others.
By following these tips, you can create a comfortable and functional workspace for your home studio.
Organizing your equipment and software
When setting up your home studio, it’s important to organize your equipment and software in a way that is efficient and practical. Here are some tips to help you get started:
- Identify your needs: Before you begin organizing your equipment and software, it’s important to identify your needs. Consider what type of music you will be producing, what software you will be using, and what equipment you will need to create the sound you want.
- Assess your space: Take a good look at the space you have available for your home studio. Measure the room and think about how you can maximize the space to fit all of your equipment and software.
- Group your equipment: Once you have identified your needs and assessed your space, it’s time to start organizing your equipment. Group your equipment by type, such as synthesizers, drum machines, and effect processors. This will make it easier to find what you need when you’re working on a project.
- Organize your software: In addition to your hardware equipment, you’ll also need to organize your software. Create a folder system on your computer that is easy to navigate and makes sense to you. You can also use software like Ableton Live or Logic Pro X to organize your sounds and samples.
- Keep cables organized: Cables can quickly become a mess, so it’s important to keep them organized. Use cable organizers or zip ties to keep cables neat and tidy. You can also label your cables to make it easier to find what you need.
By following these tips, you can create a workspace that is efficient, practical, and easy to navigate. This will help you stay focused and productive as you work on your music projects.
Customizing your studio to fit your workflow
Customizing your home studio to fit your workflow is essential for optimal productivity and creativity. Here are some tips to help you get started:
Choosing the Right Equipment
Before you start customizing your studio, you need to ensure that you have the right equipment. This includes things like a desk, chair, monitor, keyboard, and mouse. Make sure that the equipment you choose is comfortable and easy to use.
Arranging Your Workspace
Once you have the right equipment, it’s time to arrange your workspace. This includes things like the placement of your desk, chair, and monitor. You want to make sure that everything is within easy reach and that your workspace is ergonomically sound.
Optimizing Your Workflow
The final step in customizing your studio is to optimize your workflow. This means finding ways to streamline your work processes and eliminate any unnecessary steps. For example, you might want to invest in software that automates repetitive tasks or use a project management tool to keep track of your work.
Remember, the goal is to create a workspace that is tailored to your specific needs and workflow. By taking the time to customize your studio, you can improve your productivity and creativity, allowing you to produce your best work.
Recording and Production Techniques
Tips for recording high-quality audio
Creating a home studio involves not only investing in the right equipment but also understanding the technical aspects of recording high-quality audio. Here are some essential tips to help you achieve professional-sounding recordings from the comfort of your own home:
- Choose the right microphone: Invest in a good-quality microphone that suits your needs and budget. Consider factors such as polar patterns, sensitivity, and frequency response when selecting a microphone.
- Proper placement: Place the microphone at the correct distance from the sound source to capture the best sound quality. Experiment with different distances and angles to find the optimal position for your setup.
- Minimize background noise: Ensure that your recording environment is as quiet as possible. Eliminate any unnecessary noise sources, such as fans or air conditioning units, and use soundproofing materials if necessary.
- Use a pop filter: A pop filter helps to reduce plosives and other unwanted sounds that can ruin your recording. Place the filter between the microphone and your mouth to improve the overall quality of your vocals.
- Monitor your levels: Monitor your audio levels carefully to avoid clipping, which can result in distorted or unnatural-sounding recordings. Use a meter to ensure that your levels are within the optimal range.
- Optimize your software: Familiarize yourself with your digital audio workstation (DAW) and utilize its features to their fullest potential. This may include using EQ, compression, and other effects to enhance your recordings.
- Experiment with different techniques: Try out various recording techniques, such as using different microphone positions or experimenting with stereo imaging, to find the sound that best suits your style and genre.
By following these tips, you can significantly improve the quality of your home studio recordings and create professional-sounding tracks that rival those produced in expensive recording studios.
Best practices for mixing and mastering your tracks
When it comes to creating a professional-sounding recording, mixing and mastering are two crucial steps that cannot be overlooked. In this section, we will explore some best practices for mixing and mastering your tracks to help you achieve the desired sound.
Mixing
Mixing is the process of combining all the individual tracks of your song to create a balanced and cohesive sound. Here are some best practices to keep in mind when mixing your tracks:
- Keep it simple: Don’t overcomplicate your mix by adding too many effects or processing. Keep it simple and focus on the essential elements of your song.
- Balance your levels: Make sure that each instrument or vocal is balanced in relation to the others. Avoid creating a mix that is too crowded or cluttered.
- Use EQ: Use EQ to shape the tone of each instrument or vocal, and cut out any unwanted frequencies.
- Use compression: Use compression to control the dynamics of your mix and keep the levels consistent.
- Add reverb and delay: Use reverb and delay to add depth and space to your mix.
Mastering
Mastering is the final step in the production process, where you enhance the overall sound of your track to make it more radio-ready or stream-worthy. Here are some best practices to keep in mind when mastering your tracks:
- Keep it loud: Make sure your track is loud enough to compete with other songs on the radio or streaming platforms.
- Use EQ: Use EQ to shape the overall tone of your track and cut out any unwanted frequencies.
- Use compression: Use compression to control the dynamics of your track and make it more consistent.
- Add stereo width: Use stereo processing to add width and depth to your track.
- Use limiting: Use limiting to control the loudness of your track and avoid clipping.
By following these best practices, you can create a professional-sounding mix and master that will help your music stand out from the crowd.
Common mistakes to avoid in the recording process
Recording a high-quality song is an art form that requires patience, practice, and a solid understanding of the technical aspects of sound engineering. One of the most crucial steps in the recording process is avoiding common mistakes that can detract from the final product. Here are some of the most common mistakes to watch out for:
- Poor microphone technique: Using the wrong microphone, positioning it incorrectly, or failing to use a pop filter can result in a poorly recorded vocal or instrument track.
- Inadequate pre-production: Rushing into the recording process without adequate preparation can lead to poorly written songs, poorly recorded tracks, and wasted time and money.
- Lack of attention to detail: Paying close attention to every aspect of the recording process, from the quality of the equipment to the positioning of the microphones, can make a significant difference in the final product.
- Failure to properly mix and master: Mixing and mastering are critical steps in the recording process that can make or break a song. Failing to properly balance the levels, add effects, and adjust the EQ can result in a poorly produced track.
- Not having a clear vision: Having a clear vision for the sound and style of the song, and sticking to it throughout the recording process, can help ensure that the final product is cohesive and consistent.
By avoiding these common mistakes, you can set yourself up for success in the recording process and create high-quality tracks that stand out from the crowd.
Encouragement to start setting up your own home studio
If you’re an aspiring musician, producer, or sound engineer, setting up your own home studio can be a rewarding and cost-effective way to develop your skills and create professional-quality recordings. With the right equipment and a little bit of know-how, you can set up a home studio that rivals many commercial recording studios.
Here are a few reasons why you should consider setting up your own home studio:
- Affordability: Renting time at a professional recording studio can be expensive, especially for independent artists and musicians on a budget. By setting up your own home studio, you can save money on studio rental fees and invest in equipment that will pay for itself over time.
- Flexibility: With your own home studio, you can work on your music whenever it’s most convenient for you. You don’t have to worry about scheduling sessions with engineers or renting studio time at specific intervals. You can work on your music at any time of the day or night, and take breaks whenever you need to.
- Creativity: Having your own home studio allows you to experiment with different sounds and production techniques without the pressure of a deadline or a studio clock. You can try out new ideas and techniques without worrying about the cost of studio time, and you can take your time to get the sound you want.
- Professional-Quality Recordings: With the right equipment and a little bit of knowledge, you can create professional-quality recordings in your own home studio. You can use the same software and hardware that professional engineers use, and you can achieve the same level of sound quality with a little bit of practice and patience.
Overall, setting up your own home studio can be a great way to develop your skills as a musician, producer, or sound engineer, and it can be a cost-effective and flexible way to create professional-quality recordings.
Additional resources for further learning
There are numerous resources available for those looking to expand their knowledge of recording and production techniques. These resources can help you improve your skills and take your home studio to the next level.
Books
- The Audio Home Recording Handbook by Robert A. Bauer and Virginia K. Wagner
- The Craft of Music Production by Richard James Burgess
- Mixing Secrets for the Small Studio by Mike Senior
Online Courses
- Music Production in Ableton Live by Berklee Online
- The Complete Course in Game Audio and Sound Design by Berklee Online
- The Audio Engineering and Sound Design Course by School of Audio Engineering
YouTube Channels
- The Finishing Factory
- Sound Design Rants
- Holly Carter Music
Podcasts
- The Recording Revolution
- The New Music Industry Podcast
- The Mixing Engineer’s Guide to Sound
These resources offer a wealth of information on various aspects of recording and production, from the basics of setting up a home studio to advanced techniques for mixing and mastering. By taking advantage of these resources, you can continue to improve your skills and create high-quality recordings from the comfort of your own home.
FAQs
1. What equipment do I need to set up a home studio?
To set up a home studio, you will need a few essential pieces of equipment, including a computer or laptop with audio recording software, a microphone, and a set of headphones. You may also want to invest in a digital audio workstation (DAW) and a midi controller to enhance your recording capabilities. Other equipment that can be useful include speakers, a microphone stand, and acoustic panels to improve the sound quality of your recordings.
2. How much does it cost to set up a home studio?
The cost of setting up a home studio can vary widely depending on the equipment you choose and your budget. A basic setup can cost around $500, while a more advanced setup with high-end equipment can cost several thousand dollars. It’s important to consider your needs and budget when choosing equipment for your home studio.
3. What type of microphone should I use for my home studio?
There are many types of microphones to choose from when setting up a home studio, including condenser, dynamic, and ribbon microphones. Condenser microphones are popular for recording vocals and acoustic instruments, while dynamic microphones are better suited for recording loud instruments like electric guitars and drums. Ribbon microphones are known for their warm and natural sound and are often used for recording vocals and acoustic instruments.
4. How do I set up my home studio for optimal sound quality?
To achieve optimal sound quality in your home studio, it’s important to consider the acoustics of your space. This can include using acoustic panels to absorb unwanted sounds and reflections, as well as positioning your equipment and speakers properly. You should also consider using a high-quality microphone and headphones to ensure clear and accurate sound reproduction.
5. Can I use my home studio for live streaming?
Yes, you can use your home studio for live streaming. Many digital audio workstations (DAWs) include features specifically designed for live streaming, such as the ability to send audio to a streaming platform and mix multiple audio sources. You will also need a reliable internet connection and a camera to use for your live stream.