Setting up a home recording studio can be an exciting yet daunting task. It requires careful consideration of various factors to ensure that you have a functional and efficient setup. From choosing the right equipment to arranging your space, there are many elements to consider when setting up your home recording studio. In this article, we will explore the essential elements you need to create a successful home recording studio. We will discuss the necessary equipment, software, and tips for optimizing your space to help you get the most out of your recording experience. Whether you’re a beginner or an experienced producer, this guide will provide you with valuable insights to help you create a professional-sounding home recording studio.
Determine Your Recording Needs
Factors to Consider
- Type of Music: The type of music you intend to record will play a significant role in determining the essential elements of your home recording studio. For instance, if you plan to record rock music, you may require more powerful amplifiers and a drum kit with a variety of drums and cymbals. On the other hand, if you plan to record classical music, you may require a grand piano and a variety of strings and woodwind instruments.
- Recording Frequency: The frequency at which you plan to record will also influence the essential elements of your home recording studio. If you plan to record at a high frequency, you may require more advanced recording equipment such as high-end microphones and audio interfaces. Additionally, you may need to invest in additional storage space to accommodate the large amounts of data generated by high-frequency recordings.
- Quality Requirements: The quality of the recordings you intend to produce will also influence the essential elements of your home recording studio. If you plan to produce professional-quality recordings, you may require more advanced recording equipment such as high-end microphones, preamps, and digital audio workstations (DAWs). Additionally, you may need to invest in additional software and plugins to enhance the quality of your recordings. It is also essential to consider the acoustics of your recording space to ensure that you achieve the desired sound quality.
Choose the Right Equipment
Basic Recording Equipment
Setting up a home recording studio requires some essential equipment that can help you record high-quality audio. Here are some basic recording equipment that you need to consider:
- Microphone
A microphone is one of the most important pieces of equipment that you need for recording. It is used to capture the sound of your voice or instrument and convert it into an electrical signal that can be recorded. There are different types of microphones available, such as dynamic, condenser, and ribbon microphones. The type of microphone you choose will depend on your recording needs and budget. - Audio Interface
An audio interface is a device that connects your microphone and other recording equipment to your computer. It is used to convert the analog audio signal from your microphone into a digital signal that can be recorded in your DAW. An audio interface can also provide phantom power to your microphone, which is required by some condenser microphones. When choosing an audio interface, consider the number of input channels you need, the quality of the preamps, and the type of connection (USB, Firewire, Thunderbolt). - Headphones
Headphones are an essential piece of equipment for recording, as they allow you to monitor your recordings in real-time. They also help you to hear the details of your performance and make adjustments as needed. There are different types of headphones available, such as closed-back and open-back headphones. Closed-back headphones provide better isolation and are recommended for recording, as they minimize the sound leakage. - Digital Audio Workstation (DAW)
A Digital Audio Workstation (DAW) is a software application that you use to record, edit, and mix your audio. There are many DAWs available, such as Ableton Live, Logic Pro, and Pro Tools. When choosing a DAW, consider the features you need, the compatibility with your recording equipment, and the level of support for the software.
Additional Equipment
Setting up a home recording studio requires not only essential equipment but also additional equipment to enhance the quality of your recordings. Here are some additional equipment that you may need:
- Preamplifier: A preamplifier is an electronic device that amplifies the signal of your microphone before it is recorded. It helps to improve the sound quality of your recordings by providing more control over the volume and tone of your audio. A good preamplifier can make a significant difference in the clarity and warmth of your recordings.
- Instrument Cables: Instrument cables are used to connect your instruments or microphones to your mixing console or audio interface. They are designed to handle the high-impedance signals of guitars and basses, and they help to reduce noise and interference in your recordings. Make sure to use high-quality instrument cables to prevent signal loss and audio degradation.
- Microphone Stands: Microphone stands are essential for positioning your microphones correctly and ensuring that they capture the sound you want. They come in different sizes and designs, and it’s important to choose the right one for your recording setup. Some microphone stands are adjustable, which allows you to change the height and angle of your microphone for better sound quality.
- Acoustic Treatment: Acoustic treatment is a set of techniques and materials used to control the acoustics of your recording space. It involves adding absorption, diffusion, and reflection materials to your walls, ceiling, and floors to reduce echo, reverberation, and noise. Proper acoustic treatment can improve the accuracy and balance of your recordings, making them sound more professional and polished.
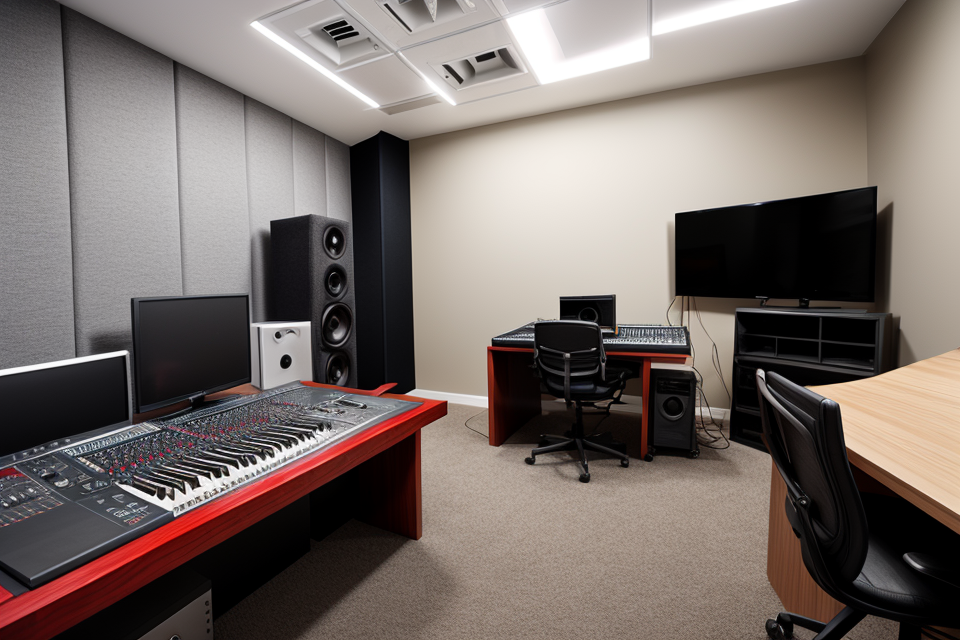
Set Up Your Recording Space
Room Treatment
Creating the perfect recording space is essential for capturing high-quality audio. Room treatment is the process of optimizing your recording environment by controlling the acoustics of the space. It involves adding, absorbing, or reflecting sound to achieve the desired sound quality.
There are three main types of room treatment:
- Acoustic Panels: These are foam or fiberglass panels that are used to absorb sound waves and reduce reflections. They are placed on walls, ceilings, and floors to improve the overall acoustics of the room.
- Diffusers: These are devices that scatter sound waves and reduce reflections. They are placed on walls and ceilings to improve the sound quality and create a more natural sound.
- Reflectors: These are objects that reflect sound waves and increase the amount of sound energy in the room. They are placed on walls and ceilings to increase the volume and clarity of the recorded sound.
It is important to note that the placement of these treatments is crucial. Acoustic panels should be placed in areas where sound is reflecting off of hard surfaces, diffusers should be placed in areas where sound is reverberating, and reflectors should be placed in areas where sound is lacking.
Additionally, it’s important to consider the size of the room, the shape of the room, and the type of sound you want to record when choosing the right room treatment for your home recording studio.
By using the right combination of acoustic panels, diffusers, and reflectors, you can create a recording environment that is optimized for high-quality sound.
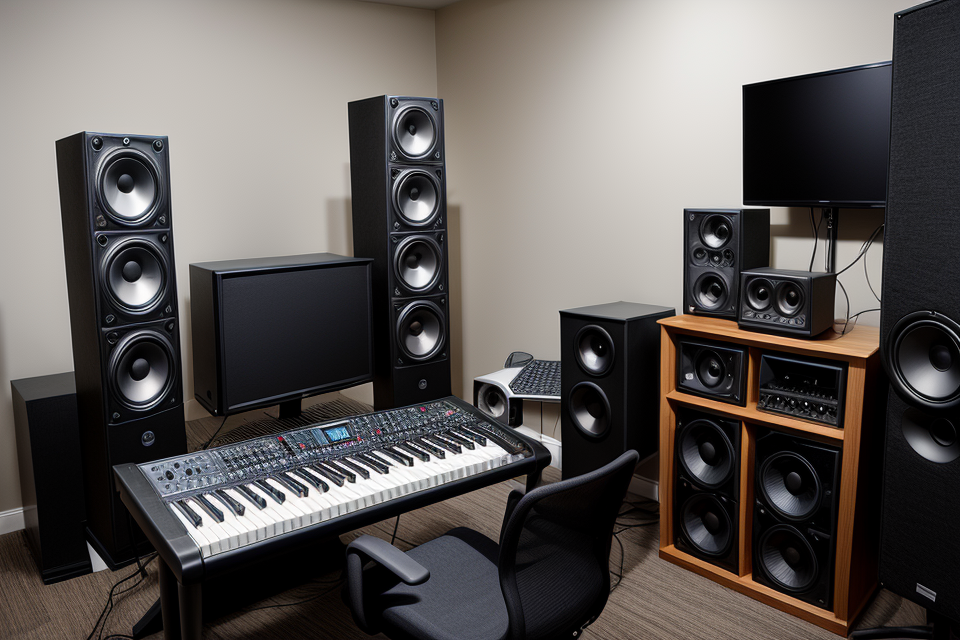
Proper Placement of Equipment
Proper placement of equipment is crucial for a successful home recording studio. The right placement of microphones, speakers, and computers can significantly impact the quality of your recordings.
Microphone Placement
Microphone placement is critical to capturing the best sound possible. Different types of microphones require different placement techniques. For example, a dynamic microphone should be placed close to the sound source, while a condenser microphone can be placed further away. Additionally, the position of the microphone in relation to the sound source can affect the sound quality. For example, placing a microphone too close to a guitar amp can result in a harsh, distorted sound.
Speaker Placement
Speaker placement is also essential to achieving the best sound quality. The placement of speakers can affect the stereo image and the overall balance of the mix. Ideally, speakers should be placed at ear level and at equal distances from the listener. This can help create a more accurate representation of how the mix will sound in different environments.
Computer Placement
Computer placement can also impact the quality of your recordings. Computers should be placed in a location that is away from the sound source and speakers. This can help reduce the amount of interference and noise that can affect the sound quality. Additionally, the computer should be placed in a location that is well-ventilated to prevent overheating.
In summary, proper placement of equipment is essential for a successful home recording studio. Microphone placement, speaker placement, and computer placement can all impact the quality of your recordings. By taking the time to properly place your equipment, you can ensure that your recordings sound their best.
Ergonomics and Comfort
Creating a comfortable and ergonomic workspace is crucial when setting up your home recording studio. Poor ergonomics can lead to physical discomfort, which can negatively impact your productivity and the quality of your recordings. Here are some essential elements to consider when setting up your recording space:
- Proper Chair and Desk Height: Your chair and desk should be adjustable to ensure that your arms are parallel to the ground when working on your computer or using your audio equipment. Your feet should be flat on the floor, and your back should be straight. This will help you maintain proper posture and prevent back pain.
- Lighting and Ventilation: Good lighting is essential for visibility when working on your computer or audio equipment. Ensure that your workspace is well-lit and free from glare. Additionally, good ventilation is important to prevent fatigue and discomfort due to poor air quality. Ensure that your workspace is well-ventilated and that you have a source of fresh air.
By focusing on ergonomics and comfort, you can create a workspace that is conducive to productivity and creativity. Taking the time to set up your workspace correctly can save you time and effort in the long run, and help you produce better quality recordings.
Optimize Your Recording Environment
Noise Reduction
Effective noise reduction is crucial in creating a high-quality recording environment. The following are some of the essential elements of noise reduction for your home recording studio:
Soundproofing
Soundproofing is the process of minimizing the amount of sound that enters or leaves a room. To soundproof your recording space, you can use the following methods:
- Seal any gaps or cracks in the walls, windows, and doors using weatherstripping or caulk.
- Add soundproofing materials such as acoustic panels, soundproofing spray, or mass-loaded vinyl to the walls, ceiling, and floor.
- Install soundproofing doors or curtains.
By effectively soundproofing your recording space, you can minimize external noise and prevent sound from escaping into the surrounding area.
Isolation Pads
Isolation pads are used to reduce vibrations and noise transfer between different components of your recording setup. These pads are typically placed under equipment such as microphones, speakers, and amplifiers.
Some common types of isolation pads include:
- Acoustic isolation feet: These are small pads that fit under the legs of your equipment to reduce vibrations and noise transfer.
- Microphone isolation mounts: These are clamps or stands that hold your microphone and provide isolation from the floor or table.
- Speaker isolation mounts: These are brackets or stands that hold your speakers and provide isolation from the floor or wall.
By using isolation pads, you can minimize noise transfer and improve the overall quality of your recordings.
Closed-Back Headphones
Closed-back headphones are designed to minimize sound leakage and provide better isolation from external noise. These headphones typically have a solid outer shell that covers the earcup, which helps to reduce sound leakage and prevent external noise from entering the earcup.
Some benefits of using closed-back headphones include:
- Improved isolation from external noise: Closed-back headphones provide better isolation from external noise, which helps to minimize sound leakage and ensure that your recordings are not affected by external noise.
- Reduced sound leakage: Closed-back headphones help to reduce sound leakage, which means that your recordings will not be affected by external noise.
- Better sound quality: Closed-back headphones provide better sound quality and reduce distortion, which helps to ensure that your recordings are of the highest quality.
By using closed-back headphones, you can minimize external noise and ensure that your recordings are of the highest quality.
Temperature and Humidity Control
When setting up your home recording studio, temperature and humidity control is crucial for ensuring the best possible sound quality. The ideal temperature range for recording is between 68-72°F (20-22°C), as this range minimizes the risk of sound distortion due to changes in temperature.
In addition to temperature, humidity control is also essential. High humidity levels can cause condensation on microphones and recording equipment, leading to poor sound quality and potential damage to your equipment. The ideal humidity level for recording is between 30-50% relative humidity.
To maintain optimal temperature and humidity levels, you can use the following equipment:
- Air Conditioning and Heating: Installing air conditioning and heating units in your recording studio can help maintain a consistent temperature throughout the year. Ensure that your equipment is well-ventilated to prevent overheating, and consider investing in a dehumidifier to complement your air conditioning unit during hot and humid months.
- Humidifiers and Dehumidifiers: If your studio experiences low humidity levels, investing in a humidifier can help increase the moisture in the air. On the other hand, if your studio experiences high humidity levels, a dehumidifier can help reduce moisture and prevent condensation on your equipment.
Remember that temperature and humidity control can have a significant impact on the quality of your recordings. By maintaining optimal temperature and humidity levels, you can ensure that your recordings sound their best and that your equipment lasts longer.
Proper Power Supply
In order to achieve optimal recording quality, it is essential to have a proper power supply for your home recording studio. Power surges and fluctuations can cause audio glitches and other unwanted distortions, so it is important to invest in surge protectors and power conditioners to ensure a stable and clean power supply.
- Surge Protectors:
- A surge protector is a device that protects electronic equipment from voltage surges and spikes. It typically has a circuit breaker that trips when the voltage exceeds a certain level, thereby protecting the connected equipment from damage.
- It is recommended to use a high-quality surge protector with a rating of at least 1000 Joules to provide adequate protection for your recording equipment.
- It is also important to note that surge protectors should be placed as close as possible to the equipment they are protecting, as the length of the cord can degrade the protection.
- Power Conditioners:
- A power conditioner is a device that filters and regulates the power supply to eliminate noise and fluctuations. It typically has a series of capacitors and other components that remove unwanted noise from the power supply, resulting in a cleaner and more stable voltage.
- Power conditioners can help to improve the sound quality of your recordings by reducing audio glitches and other distortions caused by power fluctuations.
- It is recommended to use a high-quality power conditioner with a rating of at least 1500 VA to provide adequate filtering and regulation for your recording equipment.
- It is also important to note that power conditioners should be placed as close as possible to the equipment they are protecting, as the length of the cord can degrade the filtering capabilities.
Invest in Quality Software and Plugins
Digital Audio Workstation (DAW)
When setting up your home recording studio, investing in a quality digital audio workstation (DAW) is crucial. A DAW is software that allows you to record, edit, and mix audio. It is the backbone of your recording setup, and choosing the right one can make a significant difference in the quality of your recordings.
Here are some features to look for when choosing a DAW:
- User-friendly interface: A DAW should be easy to navigate, even for beginners. Look for a DAW with a well-organized layout and intuitive controls.
- Audio recording and editing capabilities: A DAW should allow you to record multiple tracks, edit audio, and add effects.
- MIDI sequencing: MIDI sequencing allows you to create and edit music using virtual instruments and MIDI controllers.
- Virtual instruments and effects: A DAW should come with a variety of virtual instruments and effects that you can use to enhance your recordings.
- Compatibility with hardware: A DAW should be compatible with your recording equipment, such as microphones and audio interfaces.
Some recommended DAWs include:
- Ableton Live
- Logic Pro X
- Pro Tools
- FL Studio
- Reaper
Choosing the right DAW for your home recording studio will depend on your budget, experience level, and the type of music you want to create. Take the time to research and try out different DAWs to find the one that best suits your needs.
Effects Plugins
When setting up your home recording studio, investing in quality software and plugins is crucial. Effects plugins are an essential part of the recording process, allowing you to add various effects to your recordings. Here are some essential effects plugins that you should consider:
Essential Effects
- Reverb: Reverb is an essential effect that adds space and depth to your recordings. It simulates the acoustics of different environments, making your recordings sound more natural and immersive.
- Compression: Compression is a dynamic effect that helps control the volume of your recordings. It can help you achieve a more balanced mix by reducing the volume of loud parts and boosting quiet parts.
- EQ: EQ is a frequency-based effect that allows you to adjust the tonal balance of your recordings. It can help you cut or boost specific frequencies to enhance or reduce certain elements in your mix.
- Delay: Delay is an effect that adds a slight echo to your recordings, creating a sense of space and depth. It can be used creatively to add rhythmic elements to your tracks.
Recommended Plugins
- Waves SSL G-Master Buss Compressor: This compressor plugin is modeled after the legendary SSL console compressor, providing you with the same sound and control as the original hardware.
- FabFilter Pro-Q 3: This EQ plugin is known for its intuitive interface and advanced features, making it a go-to tool for many professional engineers.
- Valhalla Room: This reverb plugin is designed to simulate realistic spaces, with a focus on natural and immersive environments.
- Ableton Live: This digital audio workstation (DAW) includes a range of built-in effects plugins, including a powerful delay effect that can be used creatively in your recordings.
Instrument Plugins
When setting up your home recording studio, it’s important to invest in quality instrument plugins. These plugins allow you to add virtual instruments to your recordings, giving you a wider range of sounds to choose from. Here are some recommended plugins for instrument plugins:
Virtual Instruments
Virtual instruments are software-based versions of real-life instruments. They allow you to create realistic sounds without the need for physical instruments. Some popular virtual instruments include:
- SampleTekk A-800: This plugin emulates the sound of a Yamaha C7 concert grand piano. It’s a great option for those who want a high-quality piano sound without the space and cost of a physical instrument.
- EastWest Virtual Instruments: EastWest produces a wide range of virtual instruments, including pianos, strings, brass, and more. Their instruments are known for their high-quality samples and realistic sounds.
- Native Instruments Komplete 13 Ultimate: This plugin suite includes a wide range of virtual instruments, from synthesizers to orchestral instruments. It’s a great option for those who want a comprehensive collection of sounds to choose from.
There are many instrument plugins available, but here are some of our top recommendations:
- Native Instruments Maschine: This plugin combines a powerful sampler with a dynamic groove instrument. It’s great for creating beats and rhythms, and it’s easy to use.
- Spectrasonics Omnisphere: This plugin is a comprehensive synthesizer that’s perfect for creating complex sounds and textures. It includes a wide range of features, including a vast library of sounds and a powerful modulation system.
- Ableton Live: This plugin is a digital audio workstation (DAW) that’s great for recording, editing, and mixing music. It includes a range of built-in instruments and effects, making it a versatile tool for any home recording studio.
Overall, investing in quality instrument plugins is a crucial step in setting up your home recording studio. With the right plugins, you can create a wide range of sounds and textures to enhance your recordings.
Develop Your Recording Skills
Recording Techniques
Mastering the art of recording techniques is essential for creating high-quality recordings in your home recording studio. Here are some key techniques to focus on:
- Microphone Techniques: Microphone technique is the art of capturing the sound of an instrument or voice using a microphone. There are several techniques to consider when using microphones, including:
- Placement: The placement of the microphone can significantly affect the sound quality. It’s important to experiment with different microphone placements to find the optimal position for capturing the desired sound.
- Distance: The distance between the microphone and the sound source can also affect the sound quality. It’s important to maintain the right distance from the sound source to capture the best possible sound.
- Diaphragm Position: The diaphragm position of the microphone can also affect the sound quality. It’s important to consider the diaphragm position when recording to ensure the best possible sound.
- Recording MIDI: MIDI (Musical Instrument Digital Interface) is a protocol for communicating with electronic musical instruments, computers, and other devices. Recording MIDI can be a great way to create high-quality recordings without the need for traditional microphones.
- Editing and Comping: Editing and comping are the processes of selecting and combining the best takes from a recording session to create a final master recording. These techniques can help to improve the overall quality of your recordings by allowing you to remove mistakes and combine the best parts of each take.
By mastering these essential recording techniques, you’ll be well on your way to creating high-quality recordings in your home recording studio.
Mixing and Mastering
EQ Techniques
Equalization (EQ) is a critical aspect of mixing and mastering. It involves adjusting the volume of specific frequency ranges within an audio signal. There are several EQ techniques that can be used to enhance the sound quality of your recordings. These include:
- Cutting: This involves reducing the volume of specific frequency ranges to remove unwanted sounds or to reduce the impact of certain instruments.
- Boosting: This involves increasing the volume of specific frequency ranges to enhance the impact of certain instruments or to compensate for a lack of presence in other areas of the mix.
- Shelving: This involves boosting or cutting the entire range of a specific frequency band.
- Peaking: This involves boosting or cutting a specific frequency range with a narrow Q setting, which helps to target specific frequencies.
Compression Techniques
Compression is a process that controls the dynamic range of an audio signal. It involves reducing the volume of louder sounds and boosting the volume of quieter sounds to achieve a more consistent level. There are several compression techniques that can be used to enhance the sound quality of your recordings. These include:
- Threshold: This controls the volume level at which compression begins to take effect.
- Ratio: This controls the amount of compression applied relative to the input signal.
- Attack: This controls the speed at which compression begins to take effect.
- Release: This controls the speed at which compression stops affecting the signal after the input level drops below the threshold.
Reverb and Delay Techniques
Reverb and delay are two effects that can be used to enhance the sound quality of your recordings. Reverb adds a sense of space and ambiance to the mix, while delay creates echoes and enhances the stereo image. There are several reverb and delay techniques that can be used to achieve different effects. These include:
- Room reverbs: These simulate the sound of a recording being made in a specific room or space.
- Plate reverbs: These simulate the sound of a recording being made on a metal plate.
- Hall reverbs: These simulate the sound of a recording being made in a large hall or concert venue.
- Mono and stereo delays: These create echoes and enhance the stereo image of the mix.
Mastering Techniques
Mastering is the final step in the mixing and mastering process. It involves preparing the final mix for distribution by adjusting the overall volume, applying EQ, compression, and other effects, and adding any necessary metadata. There are several mastering techniques that can be used to enhance the sound quality of your recordings. These include:
- Loudness normalization: This involves adjusting the volume of the final mix to a standard level for distribution.
- Stereo widening: This involves enhancing the stereo image of the mix by adding depth and clarity.
- Dynamic range compression: This involves controlling the dynamic range of the mix to enhance the impact of the loudest sounds.
- EQ and compression: These techniques can be used to enhance the sound quality of the mix and prepare it for distribution.
Continuous Learning
As a musician or audio engineer, it’s important to continuously learn and improve your skills in order to produce high-quality recordings. Here are some ways to do that:
Books and Online Resources
There are many books and online resources available that can help you learn about recording techniques, equipment, and software. Some popular books for home recording include “The Home Recording Handbook” by David Burr, “Mixing Secrets for the Small Studio” by Mike Senior, and “The Power of Sound” by J.P. Hildebrand. Online resources like YouTube tutorials, forums, and podcasts can also be valuable for learning new techniques and getting advice from experienced engineers.
Courses and Workshops
Taking courses and attending workshops can be a great way to learn from experts in the field and get hands-on experience with recording equipment. Many colleges and universities offer courses in audio engineering, and there are also online courses and workshops available. Some popular online course providers include Berklee Online, Groove3, and Pluralsight. Attending music conferences and festivals can also be a great way to network with other musicians and engineers and learn about new recording techniques and equipment.
Networking with Other Musicians and Engineers
Networking with other musicians and engineers can be a valuable way to learn about new recording techniques and equipment, and to get advice from experienced professionals. Joining online forums and social media groups can be a good way to connect with other musicians and engineers, and to ask questions and get advice. Attending music events and concerts can also be a great way to meet other musicians and engineers and learn about new recording techniques and equipment.
FAQs
1. What equipment do I need to set up a home recording studio?
To set up a home recording studio, you will need a few essential pieces of equipment. Firstly, you will need a computer or laptop with a fast processor and enough RAM to handle audio recording and editing software. You will also need a digital audio workstation (DAW) software, such as Pro Tools, Logic Pro, or Ableton Live, to record, edit, and mix your music. Additionally, you will need a microphone, preferably a condenser microphone, to capture your vocals or instrument recordings. Other essential equipment includes headphones, studio monitors, and cables to connect all the devices.
2. How do I choose the right microphone for my home recording studio?
Choosing the right microphone for your home recording studio depends on your recording needs and budget. Condenser microphones are popular choices for home recording studios because they are versatile and can capture a wide range of frequencies. Large-diaphragm condenser microphones are suitable for recording vocals, while small-diaphragm condenser microphones are better for recording instruments like guitars and drums. USB microphones are also a good option for beginners, as they are easy to set up and do not require external power.
3. What are the best studio monitors for a home recording studio?
The best studio monitors for a home recording studio are those that provide accurate sound reproduction and a flat frequency response. Some popular options include the Yamaha HS8, KRK Rokit 8, and JBL 305P MkII. When choosing studio monitors, consider the size of your room, the type of music you will be recording, and your budget. It is also a good idea to read reviews and ask other musicians for recommendations.
4. How do I set up my home recording studio for optimal sound quality?
To set up your home recording studio for optimal sound quality, start by placing your studio monitors in a suitable location in your room. The monitors should be positioned at a distance from your recording area that is at least three times the diagonal length of the monitor. Next, calibrate your monitors using a calibration tool or a test tone generator. Finally, use acoustic foam or other soundproofing materials to minimize reflections and reverberation in your recording space.
5. Can I use headphones instead of studio monitors for mixing and mastering?
While headphones can be useful for tracking and monitoring your recordings, they are not a suitable substitute for studio monitors when it comes to mixing and mastering. Studio monitors provide a more accurate representation of the sound that will be played back on other systems, while headphones can distort the sound and make it difficult to judge the mix accurately. If you do not have access to studio monitors, try to use high-quality headphones with a flat frequency response for mixing and mastering.